Embarking on a coffee brewing journey needn’t be intimidating or expensive. “Mastering the art of pour over coffee Without any Equipment” offers an insightful guide into preparing the perfect cup of pour-over coffee, even without fancy brewing gadgets. You’ll learn how to expertly execute each vital step of the process, from selecting and grinding your beans to perfecting your pouring technique. Whether you’re a seasoned coffee enthusiast or a curious beginner, this easy-to-follow guide will have you indulging in an exceptional cup of joe in no time.

Choosing the Right Coffee Beans
When it comes to Mastering the Art of Pour Over Coffee, the first step begins with choosing the right coffee beans. The beans play a significant role in determining the flavor and aroma of your coffee.
Consider the Roast Level
The type of roast you choose depends on your personal preference. Light roasts have a milder flavor, while dark roasts have a stronger, more robust taste. Medium roasts are a good middle ground, offering a balance of flavor, body, and acidity. Experiment with different roast levels to find the one you enjoy most.
Look for Freshly Roasted Beans
For the freshest, most flavorful coffee, consider purchasing freshly roasted beans. The flavor of coffee decreases over time, so newly roasted beans will provide the best taste. Look for beans with a roast date on the package, and try to use them within a month of that date.
Choose Specialty Coffee
Specialty coffee refers to beans that have been grown in ideal climates and carefully harvested and processed. These beans are of higher quality than commercial-grade beans and usually have unique, complex flavors. Choosing specialty coffee can elevate your pour over experience.
Grind the Beans Yourself
Grinding your own coffee beans can significantly improve the flavor of your coffee. When you grind the beans just before brewing, it helps to preserve the oils and flavors. Bear in mind that the consistency of the grind should match the brewing method. For pour over coffee, aim for a medium grind.
Grinding the Coffee Beans
If you don’t have a coffee grinder at home, don’t worry! Here are some DIY methods you can try.
Use a Pestle and Mortar
A pestle and mortar can effectively grind coffee beans. Just add a small amount of beans to the mortar and crush them with the pestle.
Try a Ziploc Bag and Rolling Pin
Another tool you can use is a Ziploc bag and a rolling pin. Put the beans in a Ziploc bag, seal it, and then crush the beans with a rolling pin. Roll it over the bag until you achieve the desired grind.
Use the Blade of a Knife
Carefully crushing your coffee beans with the flat side of a large chef’s knife is another option. This method requires patience as you’ll need to take care to achieve a somewhat consistent size. Make sure to keep your fingers away from the blade.
Use a Pepper Grinder
A pepper grinder can be used to grind coffee beans, though it may not produce the most consistent results. Just adjust the setting to the coarsest grind, add a few beans at a time and turn the handle.
Boiling Water and Measuring Temperature
Brewing pour over coffee revolves around achieving the right water temperature. This can bring out the best flavors of the beans.
Heat Water in a Kettle
Heat your water in a kettle on a stovetop. It’s advisable not to rely on automatic shut-off features as they might not reach the preferred coffee brewing temperatures.
Use a Cooking Thermometer
If possible, use a cooking thermometer to measure the temperature of your water. The ideal brewing temperature is between 195°F and 205°F.
Use Visual Cues
If you do not own a thermometer, look for visual cues: look for small bubbles rising to the surface, this usually happens just before the water starts to boil, which is approximately at the correct temperature for brewing.
Let Boiled Water Sit for a Minute
If your water has reached boiling point, remove it from the heat and let it sit for approximately a minute. This will bring it down to the preferred brewing temperature.

Making a DIY Pour Over Device
In absence of a commercial pour over cone, here are some DIY solutions you can try.
Filtering Method using a Handkerchief
An old-fashioned method of filtering coffee involves using a clean, thick handkerchief. Drape it over a coffee mug or jar and secure it with a string or elastic band. Then gently pour your coffee mixture on it.
Using a Mesh Strainer or Sieve
A fine-mesh strainer or sieve can also serve as an improvised filter. Just be sure it’s fine enough to prevent coffee grounds from slipping through.
Improvised Funnel with Aluminum Foil
Creating a makeshift funnel out of aluminum foil and placing a filter paper on it can also do the trick. Remember to stabilize your foil funnel to prevent spills.
Using a Clean Sock
This may sound unconventional, but a clean sock does make a perfect DIY coffee filter. Make sure it’s clean and preferably unscented to avoid any unusual taste in your coffee.
Preparing the Coffee Brewing Area
A well-organized brewing space aids in easier coffee making and cleanup.
Choose a Sturdy Surface
To avoid any spills or accidents during the process, prefer a sturdy surface like a countertop or table.
Clean the Surface Thoroughly
Before starting, clean and sanitize the surface to keep the area free of dirt, residues or any unwanted objects.
Gather Necessary Tools and Materials
Have all your tools ready: the water, coffee beans, your chosen grinding method, and DIY pour over device. This makes the process seamless and enjoyable.
Clear Any Clutter
A clutter-free working area not only makes the process easier but also contributes to a more enjoyable coffee-making experience.
The Pour Over Technique
Pouring water over coffee in the right way is crucial to draw out the coffee’s best possible taste.
Pre-wet the Filter
Before adding your coffee grounds, make sure to dampen your filter (whether using a DIY or commercial one). This helps to eliminate any papery taste.
Add Coffee Grounds
Then, add your freshly ground coffee. The amount you use depends on how strong you like your coffee and how much water you’re using. A general guideline is 1 to 2 tablespoons per 6 ounces of water.
Start Pouring in a Circular Motion
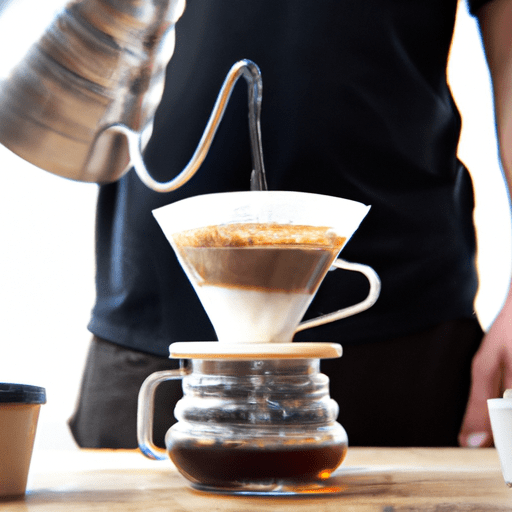
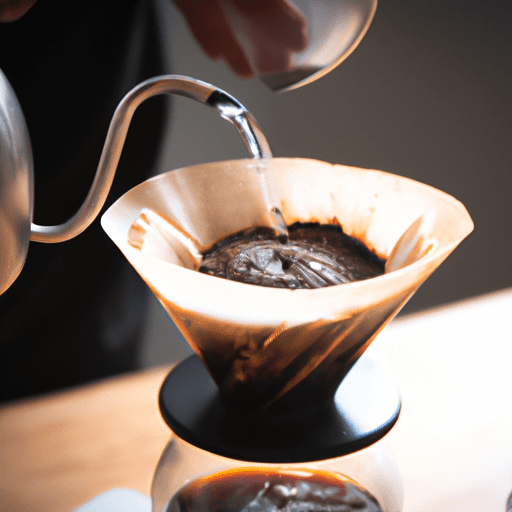
Pour your heated water slowly and evenly over the coffee grounds, starting from the center and moving outward in a circular motion. This ensures all the grounds are evenly saturated, leading to a more balanced flavor.
Control the Pouring Speed
Don’t rush the process. Pour over is all about precision and patience. The entire brewing process should take about 3 to 4 minutes.
Timing and Brewing Ratios
Achieving the perfect brew also involves monitoring brewing time and experimenting with brewing ratios.
Monitor the Brewing Time
Follow the recommended brewing time for pour over coffee (around 3 to 4 minutes) as closely as possible.
Experiment with Brewing Ratios
Feel free to experiment with different coffee-to-water ratios. Start with a 1:15 coffee-to-water ratio and work your way up or down depending on your taste preference.
Adjust the Ratio to Taste
Remember, there is no absolute right or wrong. If your coffee tastes too strong, use less grounds next time. If it’s too weak, add some more.
Keep a Record of Brewing Ratio
Keeping a record of your preferred brewing ratios will help you consistently reproduce your favorite taste profile.
Troubleshooting Common Issues
If your pour over coffee doesn’t taste quite right, it could be due to over-extraction, under-extraction, uneven extraction, or a clogged filter.
Over-Extracted Coffee
Over-extracted coffee means the water has pulled too many compounds out of the beans, and might taste bitter. You can correct this by using coarser grinds or reducing the brewing time.
Under-Extracted Coffee
Under-extracted coffee might taste sour, because not enough desirable compounds have been extracted from the beans. To correct this, grind the beans finer or increase brewing time.
Uneven Extraction
Uneven extraction often results from pouring water unevenly or using the incorrect amount of coffee. Try to pour water consistently over all the grounds and use the correct coffee to water ratio.
Clogged Filter
If the water is not filtering through or it’s going very slowly, your filter might be clogged. Ensure you’re not grinding your beans too fine, and try to keep the filter clean and free of residue.
Enhancing the Pour Over Experience
As you continue exploring the world of pour over coffee, consider experimenting with different coffee origins, brewing methods, and flavor profiles.
Experiment with Different Coffee Origins
Different coffee origins offer different tastes and aromas. Don’t hesitate to try out beans from different regions.
Try Different Brewing Methods
Experiment with different brewing methods like French press, cold brew, and Chemex to see how the flavors differ.
Explore Flavor Profiles
Delve into the world of coffee flavor profiles and learn how factors like roast level and origin can affect tasting notes like fruitiness, acidity, and body.
Pair Coffee with Food
Enhance your coffee drinking experience by pairing it with the right food items. Like wine, coffee has flavors that can complement or contrast with certain foods.
Cleaning and Maintenance
Taking proper care of your DIY coffee equipment enhances the longevity and the overall coffee experience.
Dispose of Used Coffee Grounds Properly
Post brewing, dispose of your used coffee grounds in an eco-friendly manner. They are compostable and can be used as an organic fertilizer for plants.
Wash and Dry the DIY Pour Over Device
Cleanup is just as important as setting up. Make sure to wash and thoroughly dry your DIY pour over device to avoid mildew and ensure it’s ready for the next use.
Keep Tools and Materials Clean
Make sure to keep all your tools and materials clean. This includes cups, grinders, filters, and anything else you’re using in your brewing process.
Regularly Deep Clean the Brewing Area
Finally, take some time every once in a while to deep clean your brewing area, including the surface you’re brewing on and any drawers or cabinets where you store your coffee supplies.
Mastering the art of pour over coffee can be an enjoyable journey. Take your time, enjoy the process, and modify along the way according to your preferences. Happy Brewing!
