Ready to enjoy the best cup of coffee, all from the comfort of your own home? This article is set to shake up your home-brewing methods as it gives you easy, step-by-step techniques to make pour-over coffee, and guess what? No cone filter is required. Along your journey into the rich aroma of coffee beans, you’ll discover how simple household items can substitute traditional brewing equipment, making the perfect cup easy and accessible. Let’s start brewing – the freshest cup of coffee is just minutes away!

1. Using a Filter Bag
The art of coffee brewing can often lead you into the world of experimentation, and using a filter bag is one of them. The purpose is to get your desired cup of coffee without compromising the flavors and aroma.
1.1 Choosing the Right Filter Bag
When it comes to choosing a filter bag, there several options out there with variance in material and sizes. Generally, you should look for ones made of natural unbleached cotton or hemp which doesn’t impart any extra flavors to your coffee. The size of the filter bag should be able to hold your desired amount of coffee grounds without overflowing.
1.2 Preparing the Filter Bag
Before brewing, it’s advisable to rinse your filter bag in hot water. It helps to both clean the bag and preheat it, which can improve the extraction process. Once rinsed, you can then add your coffee grounds.
1.3 Brewing Process Using a Filter Bag
The brewing process begins by placing the filter bag into your coffee mug or carafe. Then, slowly pour hot water over the grounds, ensuring they are all entirely soaked. Allow your coffee to steep for around 3-5 minutes, then carefully remove the filter bag. Voila, your coffee is ready to savor!
2. Utilizing a French Press
The French Press is a classic and versatile coffee brewing method that you might consider an essential investment for your coffee corner.
2.1 Grinding the Coffee Beans
For the French Press, you should grind your coffee beans to a coarse consistency, similar to sea salt. This prevents the coffee from turning out over-extracted and overly bitter.
2.2 Preparing the French Press
First, rinse your French Press with hot water to warm it up. Then, pour the ground coffee into the bottom of the French Press.
2.3 Brewing Process Using a French Press
Pour in just enough water to soak the grounds. Stir it slightly, then add the rest of the water. Cover and let it steep for about 4 minutes. Push the plunger down slowly, separating the grounds from the liquid. Pour and enjoy!
3. Trying a Sock or Cloth Method
The sock or cloth method, while more unconventional, can definitely come in handy during those emergency caffeine needs.
3.1 Selecting the Appropriate Sock or Cloth
If using this method, it’s best to opt for a clean, unused cotton sock (yes, you read that right), or a fine linen cloth of a decent size.
3.2 Preparing the Sock or Cloth
Thoroughly wash your chosen sock or cloth and then rinse it in hot water prior to using it.
3.3 Brewing Process Using a Sock or Cloth
Place the sock or cloth over the mouth of the carafe or mug, ensuring it goes down a bit into the vessel, like a pocket. Place your coffee grounds into the pocket and slowly pour over heated water, allowing it to go through the grounds and sock/cloth filter. Let it steep for 4-5 minutes and your brew should be ready.

4. Opting for a Metal Mesh Strainer
If you prefer a stronger, more robust cup, you might like using a metal mesh strainer.
4.1 Choosing the Right Metal Mesh Strainer
Choose a strainer with a fine mesh, to minimize the number of coffee grounds that make it into your cup. There should also be enough space inside the strainer to allow the coffee grounds to spread out and properly express their flavor.
4.2 Preparing the Metal Mesh Strainer
Rinse your metal mesh strainer under hot water to clean it up and, importantly, warm it up.
4.3 Brewing Process Using a Metal Mesh Strainer
Place the strainer over a cup or a jug. Pour your ground coffee into the strainer and slowly pour the hot water. Let it steep until it attains your desired strength before removing the strainer.
5. Experimenting with an AeroPress
The AeroPress is another excellent alternative brewing method that is loved for its fast and reliable process.
5.1 Assembling the AeroPress
After securing the filter in the basket, assemble the AeroPress by placing it on a sturdy mug with the basket end down.
5.2 Preparing the Coffee and Water
Add your preferred amount of coffee grounds into the AeroPress chamber. Heat your water to about 200°F or just below boiling point.
5.3 Brewing Process Using an AeroPress
Pour the heated water over the coffee, stirring gently to ensure all the coffee grounds are saturated. Insert the plunger and press down gently until your mug is filled with rich, rewarding coffee.
6. Using a Moka Pot
For fans of strong, espresso-like coffee, the Moka Pot is a perfect brewing tool.
6.1 Grinding the Coffee Beans
For the Moka pot, you’ll want your coffee finely ground, though not quite as fine as espresso grounds.
6.2 Preparing the Moka Pot
Fill the bottom chamber with water up to the valve, then add coffee grounds to the filter basket and assemble the pot.
6.3 Brewing Process Using a Moka Pot
Place the pot on the stovetop and heat it over medium heat. Wait for the coffee to percolate up into the top chamber, then remove from heat. Pour it into your cup and enjoy!
7. Trying a Vietnamese Coffee Maker
This unique method gives you deliciously strong coffee, perfectly complemented by the traditional addition of sweetened condensed milk.
7.1 Choosing the Right Vietnamese Coffee Maker
A Vietnamese coffee maker is a small pot-like tool made of metal. It usually comes in different sizes to suit different serving sizes.
7.2 Preparing the Vietnamese Coffee Maker
Remove the top screen from the maker, then add your coffee grounds, and screw the top screen back on loosely.
7.3 Brewing Process Using a Vietnamese Coffee Maker
Place the coffee maker on top of your cup. Pour a bit of hot water to wet the coffee grounds and wait for about 20 seconds before adding more water. Cover it with the lid and wait for the coffee to slowly drip into your cup.
8. Utilizing a Chemex without a Cone
The Chemex, even without a cone, can give you a delicious pour-over coffee.
8.1 Modifying a Chemex for Alternative Brewing
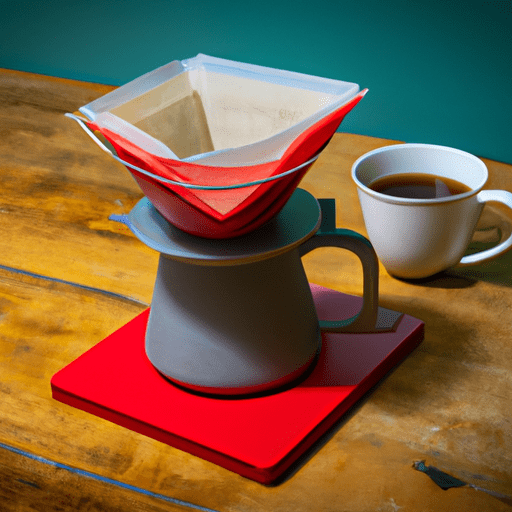
Without a cone, you can use a folded cloth or a large coffee filter. Secure it onto your Chemex using a rubber band or a piece of string.
8.2 Preparing the Coffee and Water
Place your coffee grounds in the filter or cloth and heat your water just below boiling point.
8.3 Brewing Process Using a Chemex without a Cone
Slowly pour the water over the coffee grounds, starting in the center and moving outwards in a circular motion. Once you’ve poured all the water, let it steep for around 4 minutes before removing the makeshift filter.
9. Trying a Clever Dripper
This tool cleverly combines the best elements of French press and pour-over coffee.
9.1 Setting Up the Clever Dripper
Set the Clever Dripper over a mug or carafe. Add a paper filter to the dripper and rinse it with hot water.
9.2 Preparing the Coffee and Water
Place your coffee grounds into the filter and heat your water to just below boiling.
9.3 Brewing Process Using a Clever Dripper
Pour the water over the grounds, saturating them thoroughly. Allow it to steep for 2-3 minutes before releasing the brewed coffee into your mug or carafe by lifting the Dripper.
10. Using a Tetsu Kasuya Style Brewer
This method is based on the brewing technique of the 2016 World Brewers Cup Champion, Tetsu Kasuya.
10.1 Understanding the Tetsu Kasuya Style Brewer
This brewing method divides the total water into 40% and 60% parts. The first 40% is poured in four separate pulses, then the remaining 60% is added in two equal parts.
10.2 Preparing the Brewer and Coffee
Prepare your brewer and coffee as you usually would. Be sure to have a good scale on hand to measure your water accurately.
10.3 Brewing Process Using a Tetsu Kasuya Style Brewer
Start by pouring 40% of the water, ensuring the coffee grounds are thoroughly wet. Wait for about 45 seconds. Then add the remaining water in two equal parts, waiting for 45 seconds in between. After the last pour, wait for all the water to pass through before enjoying your coffee.
There you have it, ten alternative methods to make your pour-over coffee without a cone. So, the next time you’re in a coffee brewing conundrum, why not try one of these methods and dive into a world of flavors!
